
Connect a client
Claude
Claude reaches Rendley three ways: a custom connector in Claude Desktop or the web app, a command in Claude Code, or a one-click install from the connector directory.
Use the custom automation endpoint when you want Claude to work with files, run the edit, create motion graphics with its own model access, and return an export. The one-click directory version prepares a project for review but does not finish it. Which endpoint explains the difference.
Add the automation connector (Desktop and web)
Custom connectors are available on every Claude plan, with Free limited to one. The Desktop app and Claude on the web share the same Connectors screen, so these steps cover both.
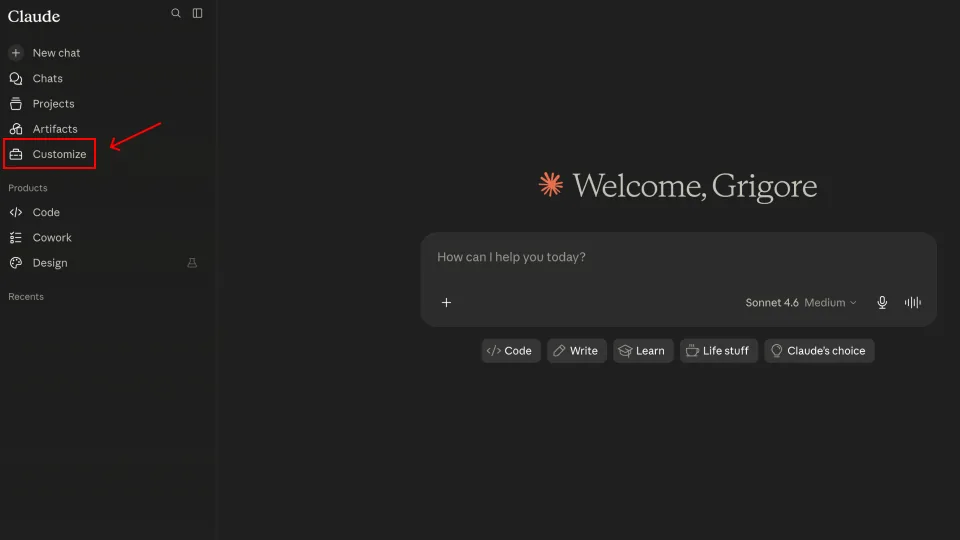
1. Open customize
In the Claude sidebar, click Customize.
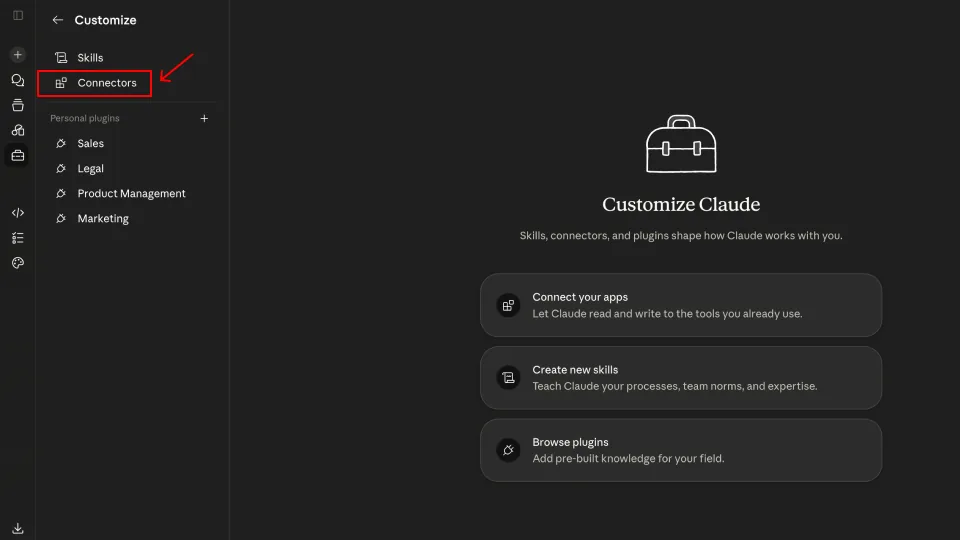
2. Open connectors
In the Customize panel, select Connectors.
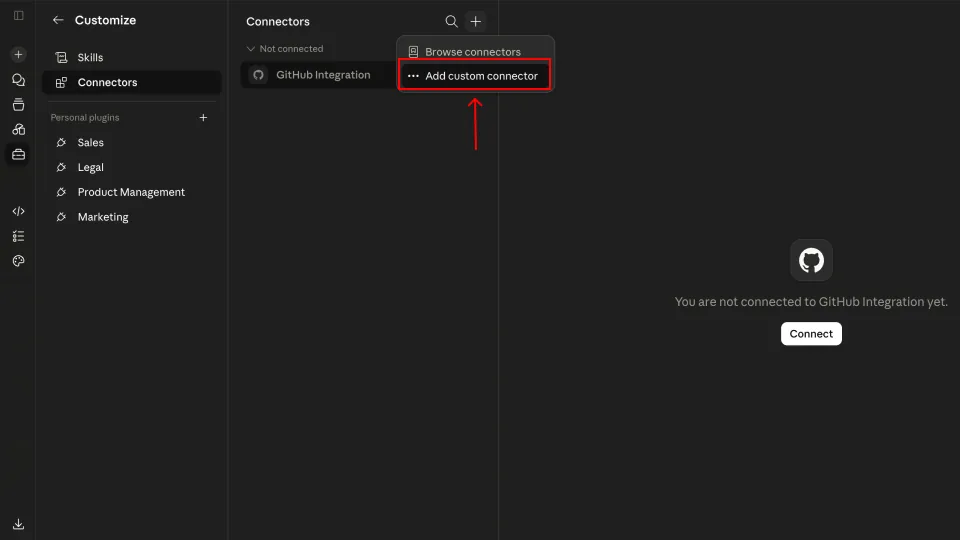
3. Add a custom connector
Click the + icon at the top of the Connectors list and choose Add custom connector.
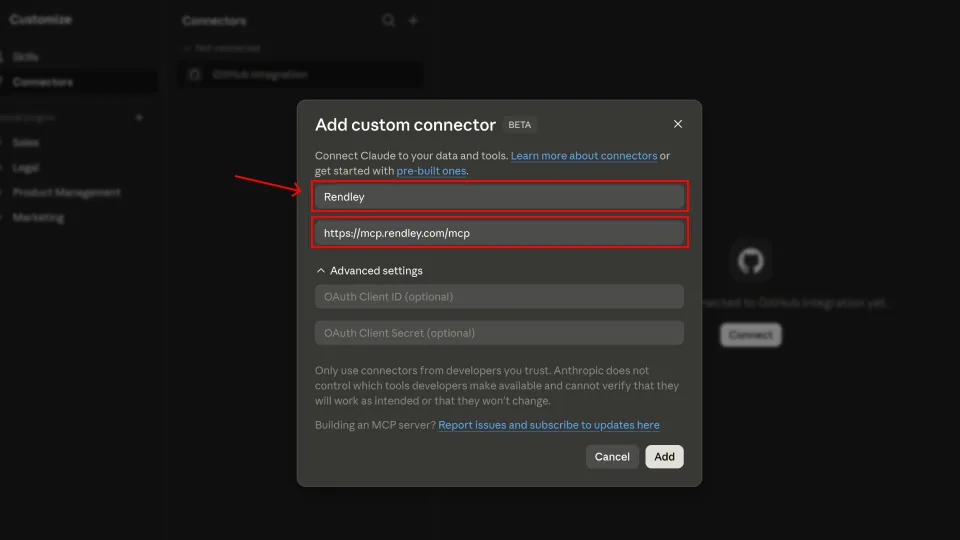
4. Enter Rendley’s details
Name the connector Rendley Automation and paste:
https://mcp.rendley.com/mcp/automationLeave the OAuth fields empty, then click Add.
5. Connect
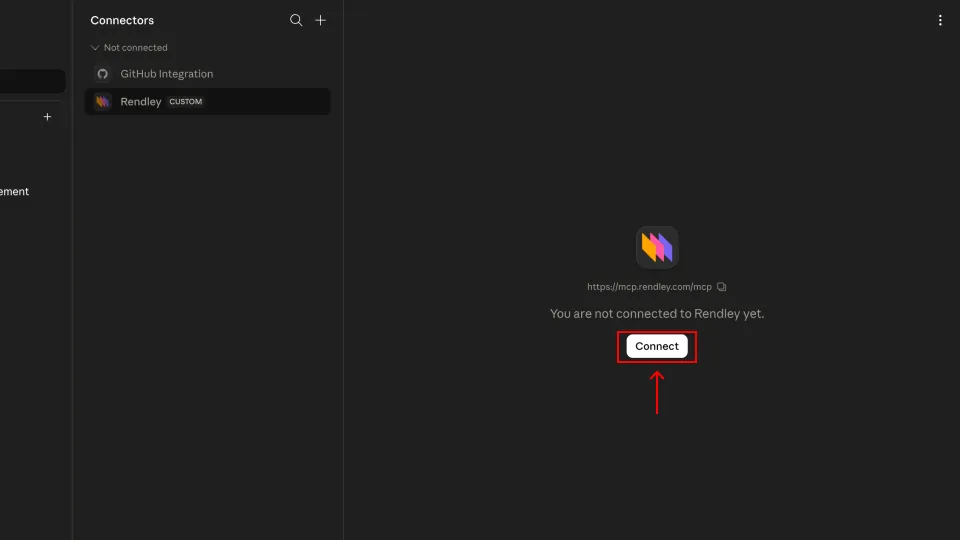
Rendley now appears under Connectors. Click Connect to open the Rendley sign-in tab, then click Allow access.
6. Review tool permissions
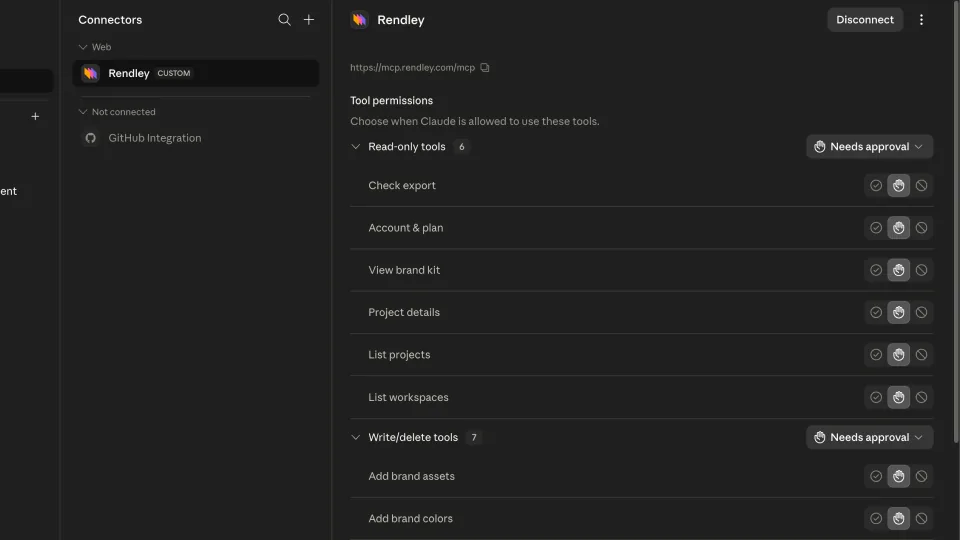
Claude lists every Rendley tool grouped by Read-only and Write/delete. Set each to Ask, Allow, or Block depending on how much autonomy you want to give Claude. This step is optional.
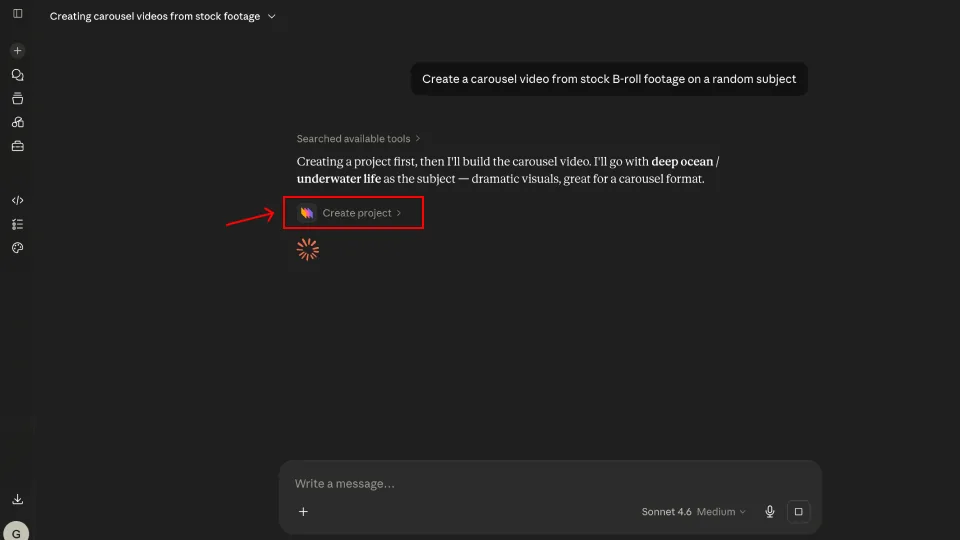
Start a new chat and ask Claude to list your Rendley workspaces. Then try a small edit from Example prompts.
Claude Code
Register Rendley once and every session can use it:
claude mcp add --transport http rendley-automation https://mcp.rendley.com/mcp/automationThen run /mcp inside Claude Code and pick Authenticate. A browser tab opens, you approve access in Rendley, and the session is stored.
To use an API key instead of signing in, pass it as a header:
claude mcp add --transport http rendley-automation https://mcp.rendley.com/mcp/automation \
  --header "Authorization: Bearer YOUR_RENDLEY_API_KEY"
Get a key from Settings → API Keys in Rendley. See Authentication for the full flow.
Add --scope project to share a server with your repo. It is written to .mcp.json at the project root, which you can commit.
One-click directory connector
Rendley is also listed in the Claude connector directory. Click Connect, sign in to Rendley, and approve access. There is no URL or key to copy.
What to read next
- Connect your AI client covers the endpoint choice and the test that proves the connection.
- Authentication covers OAuth sign-in, API keys and the paid-plan gate.
- Example prompts shows what to ask Claude to create.
- Troubleshooting lists the errors people hit and what fixes them.