Connect ChatGPT
Rendley connects to OpenAI two ways: as a custom connector inside ChatGPT, where you sign in once over OAuth, or as an MCP server in the Codex app and CLI, where you pass a bearer token. Pick the one that matches how you work.
ChatGPT (custom connector)
ChatGPT talks to Rendley through a custom connector that authenticates over OAuth, so there is no key to copy or rotate. Custom connectors run on the paid ChatGPT plans (Plus, Pro, Business, Enterprise, and Edu) and require developer mode for MCP servers.
1. Enable developer mode
Open Settings → Connectors → Advanced and turn on Developer mode. This exposes custom MCP connectors.
2. Create the connector
Back in Settings → Connectors, click Create. Fill in the form:
- Name:
Rendley - MCP server URL:
https://mcp.rendley.com/mcp - Authentication: OAuth
Submit the form to add the connector.
3. Sign in
Click Connect on the Rendley connector. A Rendley sign-in tab opens, click Allow access to authorize ChatGPT. The connector now shows as connected, no API key required.
4. Use it in a chat
In the composer, open the + menu and enable the Rendley connector for the conversation. ChatGPT can now call Rendley whenever a request needs video. Jump to Try it to confirm.
Codex (desktop app)
Codex talks to Rendley over an MCP server with a bearer token. First create the key in Rendley, then add the server in Codex.
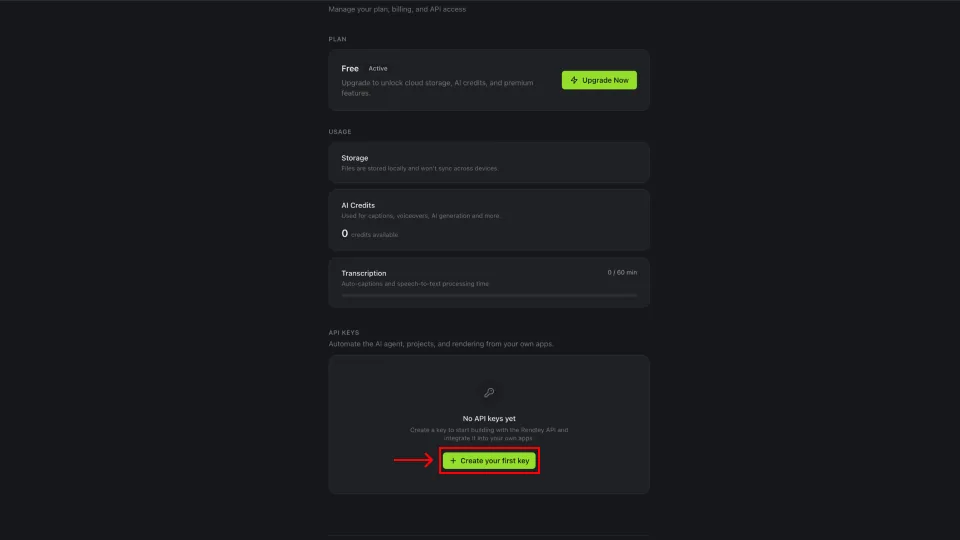
1. Create a Rendley API key
In Rendley, open Settings, scroll to API Keys, and click + Create your first key.
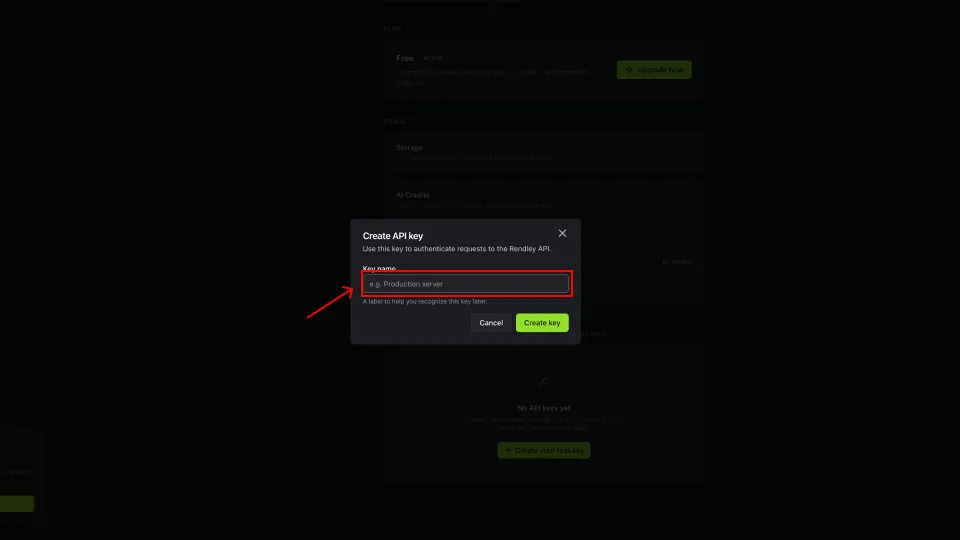
Name the key (for example Codex) and click Create key.
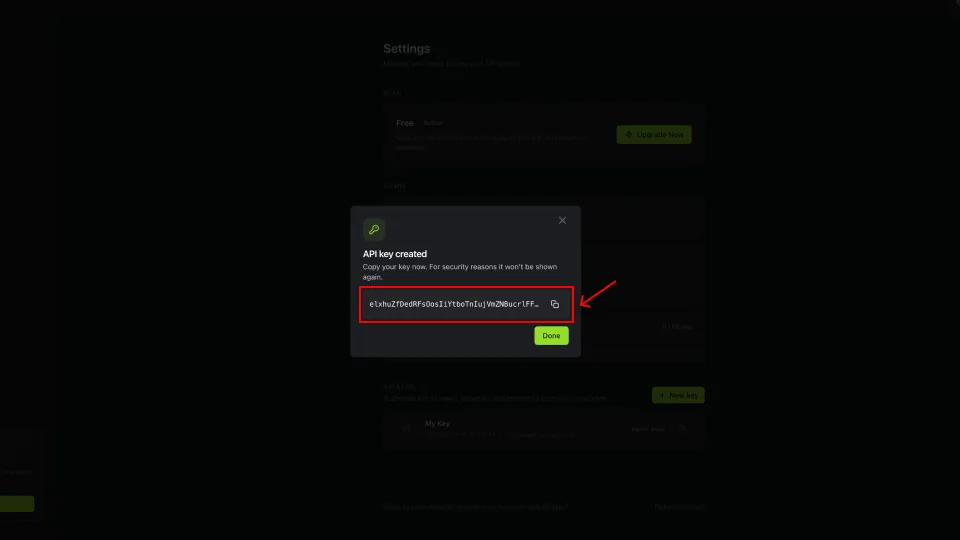
Copy the key now. Rendley shows it once.
2. Open Codex Settings
In Codex, click your avatar in the bottom-left, then Settings.

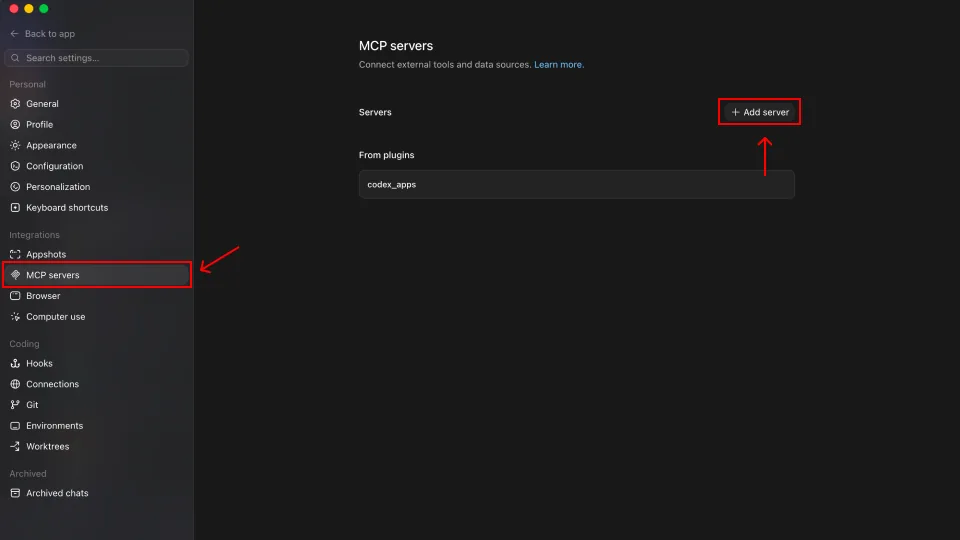
3. Add an MCP server
Under Integrations, select MCP servers, then click + Add server.
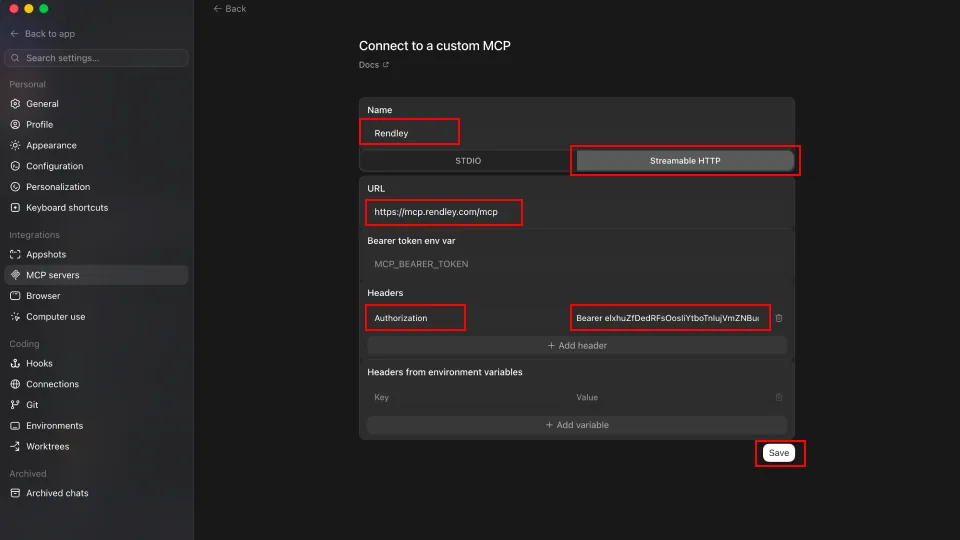
4. Configure Rendley
Fill in the form and click Save:
- Name:
Rendley - Transport: Streamable HTTP
- URL:
https://mcp.rendley.com/mcp - Headers: add a header with key
Authorizationand valueBearer YOUR_RENDLEY_API_KEY
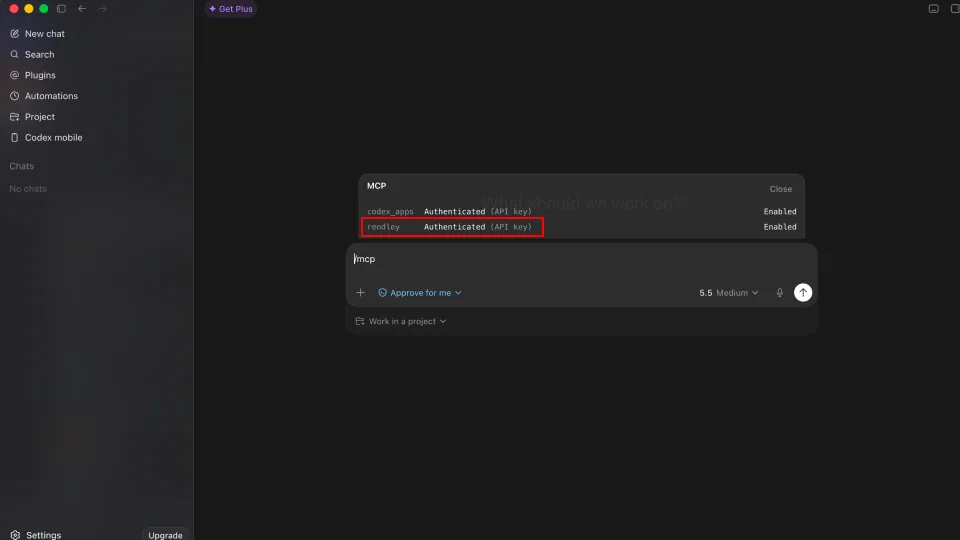
5. Verify the connection
In a new chat, type /mcp. You should see rendley listed as Authenticated (API key) and Enabled.
Codex CLI
The Codex CLI uses ~/.codex/config.toml. Point it at an environment variable for your key:
[mcp_servers.rendley]
url = "https://mcp.rendley.com/mcp"
bearer_token_env_var = "RENDLEY_API_KEY"
Then export the key (add it to your shell profile so new sessions inherit it):
export RENDLEY_API_KEY="your_key_here"Keeping the key in an env var means a rotated key just needs a new export, with no config edit.
Try it
Ask in the chat:
What can Rendley do here?
List my projects.
If ChatGPT or Codex lists Rendley’s tools and your projects, you’re connected. From there, describe the video you want and it builds the edit and returns a link.
Common issues
- ChatGPT does not show the connector. Confirm you are on a paid plan and that Developer mode is enabled under Settings → Connectors → Advanced, then enable Rendley from the composer’s + menu.
- The OAuth tab will not sign in. Allow pop-ups for
app.rendley.comand try connecting again. - Codex returns
401. The bearer token is wrong or missing. In the desktop app, re-check theAuthorizationheader. In the CLI, runecho $RENDLEY_API_KEYto make sure it’s exported in the shell that launched Codex. rendleynot listed under/mcp. Open Settings → MCP servers and confirm the server is saved and enabled.
More fixes in Troubleshooting.